How Do You Know When Your Sourdough Starter Is Done
Learn how to make a beginner sourdough starter at domicile. All you need is flour, water and a picayune bit of patience. Earlier you know it, you'll have your very own bubbly, active starter gear up to make THE BEST due south ourdough bread!
Looking to bake incredible sourdough bread?
Start: you'll need a sourdough starter. Without it, your bread won't rise. It'south the absolute heart and soul of sourdough baking. Creating 1 from scratch is certainly non hard to do. However, the procedure can seem intimidating (peculiarly for beginners). Let'south alter that.
In this tutorial, adapted from my book Artisan Sourdough Made Simple, I will demystify and simplify the procedure stride-by-stride. Once your starter is established, it can be used for a wide diverseness of sourdough breadstuff recipes including this scrumptious sourdough bread with olive oil (most popular recipe on my blog!), easy sourdough sandwich staff of life, light whole wheat sourdough, homemade sourdough bagels and and then much more!
What is a Sourdough Starter?
Sourdough is more than than merely a recipe; it'due south an understanding. So earlier nosotros dive in, let's ascertain.
Merely put: a sourdough starter is a live fermented culture of fresh flour and h2o. Once combined, the civilization begins to ferment cultivating the natural yeasts establish in our environment. A small portion is added to your staff of life dough to make it rise.
Commercial yeast IS Not required.
Sounds a bit weird, right? Of form it does. And it should. All you need to know is this: natural "wild" yeast is all around u.s.. Information technology tin can be found in a pocketbook of flour, in the air, on your hands… Just considering you can't see it, doesn't hateful it'due south not there and doing its thing. It's like magic.
What to Expect
The overall procedure should take virtually 7 days (or more) from start to cease- it's not instant.
First, you'll create the starter with whole wheat flour to jumpstart fermentation. Then, you'll continue to feed it with regular white flour to cultivate the wild yeasts and friendly leaner.
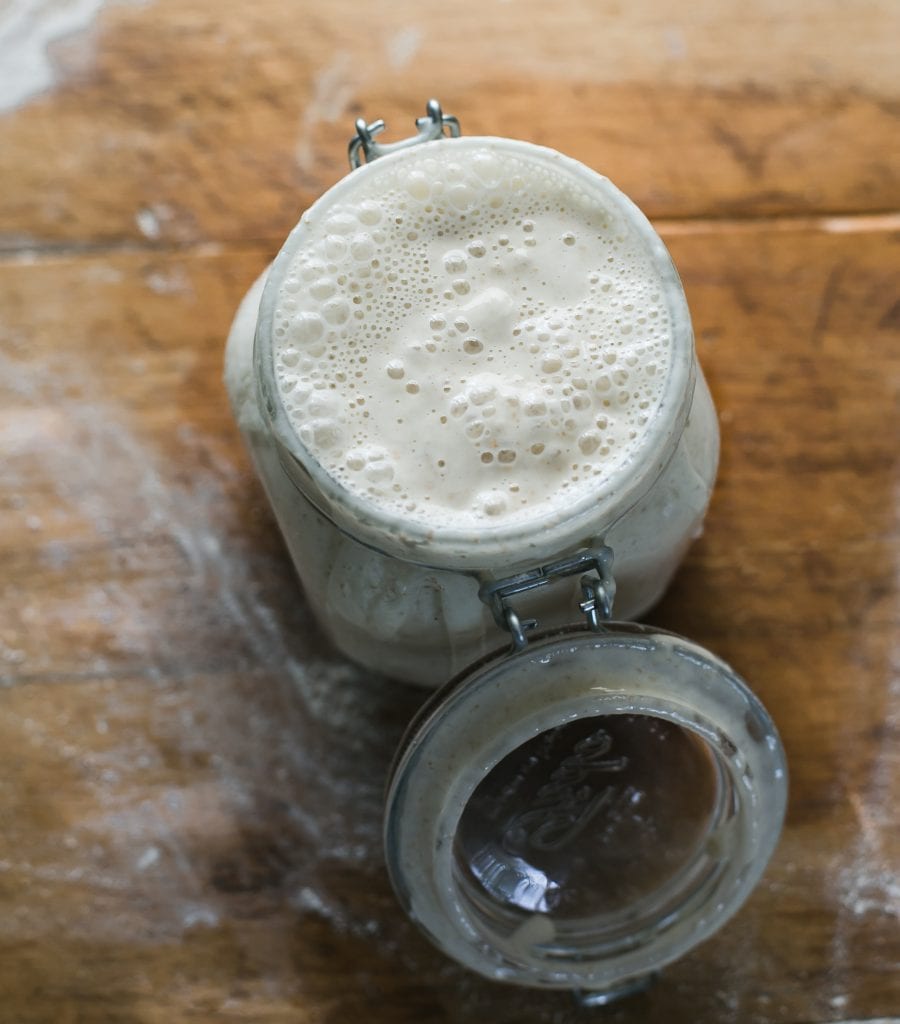
Your starter is ready when information technology has doubled in size, with plenty of bubbling on the surface and throughout the culture.
Note: It's not uncommon for information technology to take up to 2 weeks or more than for the starter to get active. It all depends. I know this timeframe sounds a bit vague, but growing yeast in a jar (that's basically what you're doing) can be unpredictable at times. Please be patient if the process takes time for you- it's normal.
Is it Difficult to Do?
Absolutely not!
In short: you're basically adding flour and water to a jar, feeding it with more flour and water over time, and and then waiting for information technology to become bubbly and double in size. That'southward it. Near of your time interest is easily-off.
Can I inquire you a favor though?
Don't overthink it.
There'southward a lot of data out at that place, and you will fall downward a major rabbit hole if you offset poking around. Just stick to this tutorial for now and follow the steps.
Beginner Sourdough Starter Recipe
Yous volition Need:
Supplies
- 3/iv Fifty jar (I use this ane)
Ingredients
To create the starter:
- 60 g (1/2 cup) whole wheat flour
- 60 g (1/iv cup) water
To feed the starter each twenty-four hour period (24-hour interval 3-7):
- sixty g (1/2 cup) unbleached all purpose flour or bread flour
- 60 g (i/4 cup) water
Tip: Use regular, unbleached all purpose flour for best results- skip organic. The enzymes are different which can hinder the ascension procedure the first time around. I use either KAF, Trader Joe'due south or Whole Foods. Filtered water or tap h2o is fine. Employ the latter if yous know it's mostly chemical/chlorine complimentary.
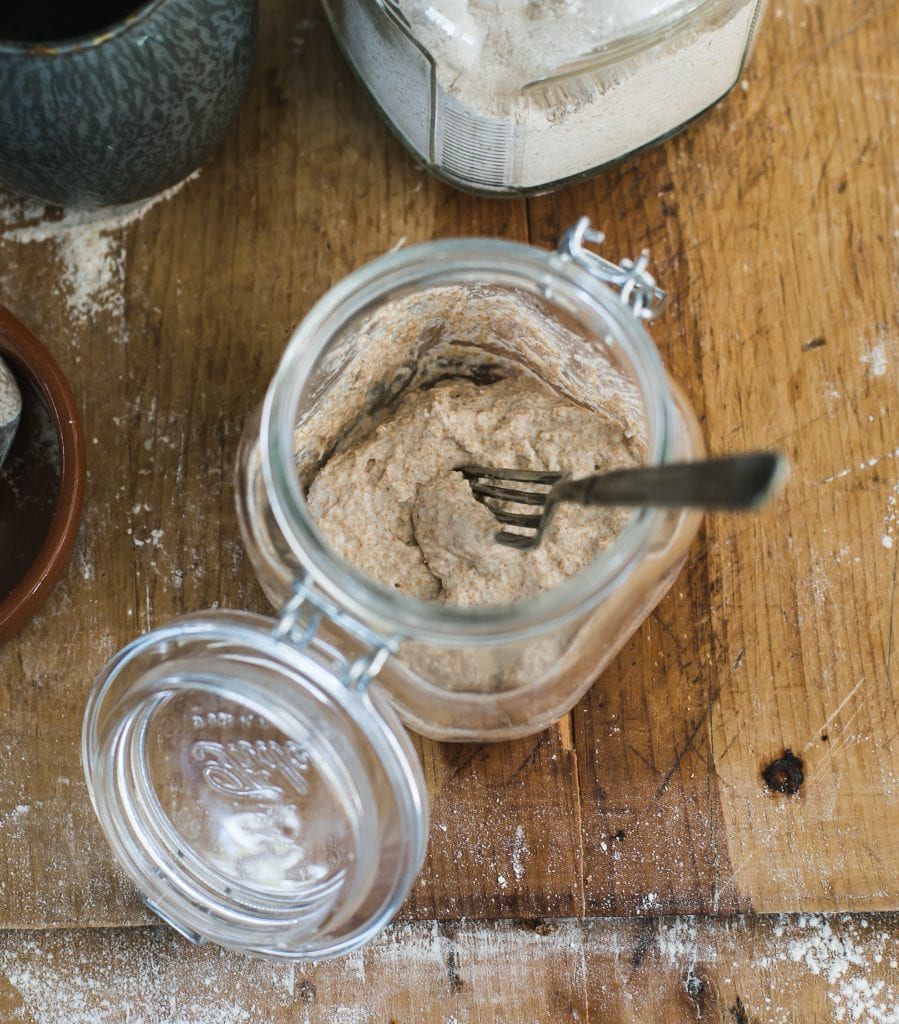
Day 1: Make the Starter
Combine lx one thousand (one⁄ii loving cup) of whole wheat flour and 60 k (i⁄4 cup) of warm water in a large jar.
Mix with a fork until polish; the consistency will be thick and pasty. If measuring past volume, add together more water to thin out the texture if needed. Cover with plastic wrap or a lid, and allow information technology rest in a warm spot, about 75-80 F for 24 hours.
Tip: Looking for a warm spot? Place your starter on a cookie sheet within the oven (turned off) with the lite on for a few hours (but not overnight- it might become too warm). You can also use a proofing box ready to your desired temperature, or a microwave with the door ajar and the light on.
Day 2: Got Bubbles?
Today, you're going to check if any minor bubbling have appeared on the surface.
Bubbles betoken fermentation, which is what you want! However, information technology'southward okay if you don't see annihilation right away; the bubbles might have appeared and dissolved overnight while you were sleeping. This happens quite often.
You lot exercise not have to do anything else right now. It does not need any flour or water. But residual the starter in your warm spot for another 24 hours.
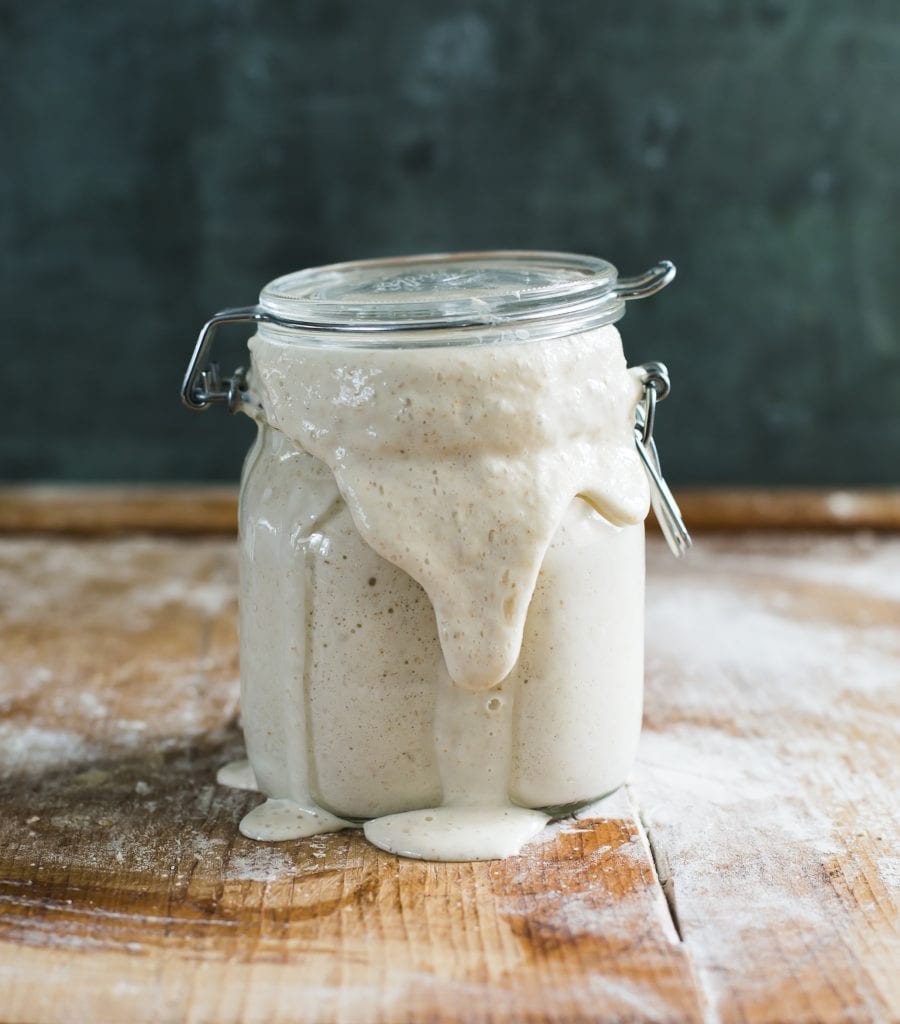
Day ii (Con't): What'due south that brown liquid?
During the creation process, and even after your starter has been established, a nighttime liquid might appear on the starter (the paradigm higher up shows the liquid in the centre of the starter- it's usually found on the surface).
This liquid is called "hooch" and is an indication that your starter needs to exist fed. Information technology as well has a very stinky smell, similar to rubbing alcohol or gym socks. This is normal. Don't freak out. Any time you see this liquid, it's best to pour it off, forth with whatever discolored starter present. All the same, on Day 2 just leave the hooch alone; you lot can get rid of information technology tomorrow when yous kickoff the feedings.
Day three: Feed Your Starter
Whether bubbles are visible or not, it'due south time to start the feeding process.
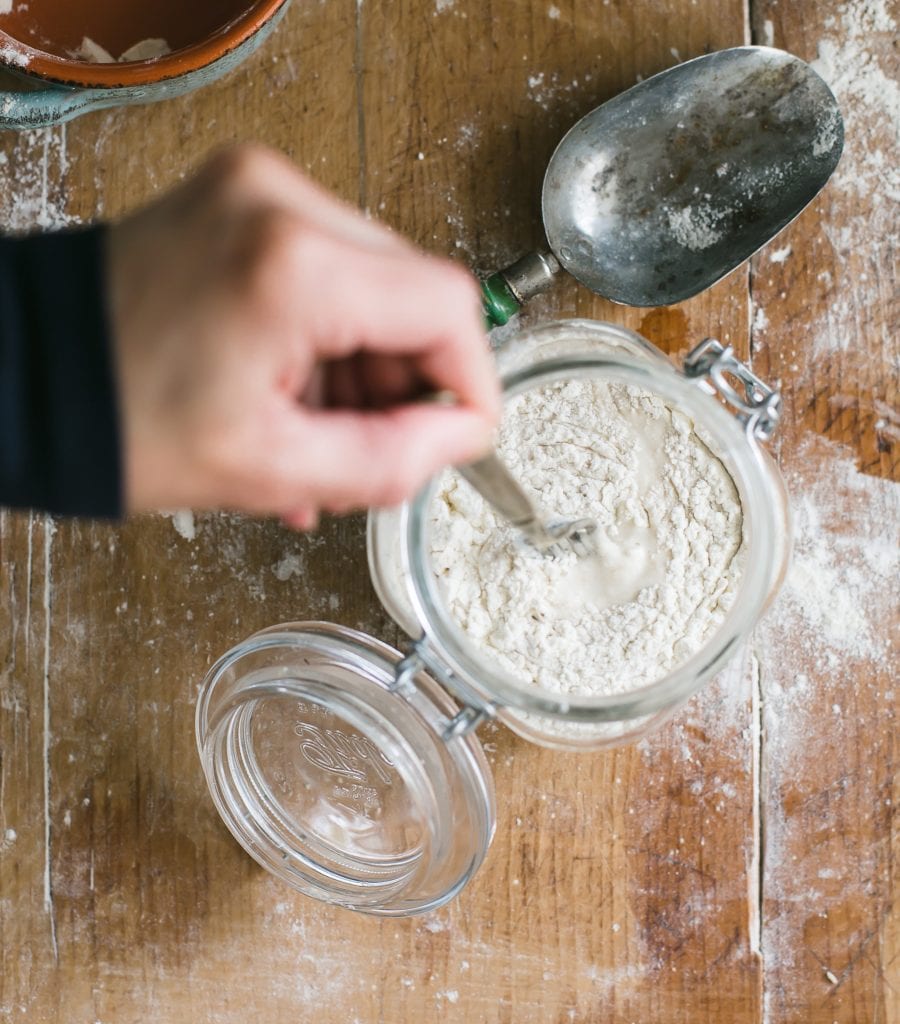
Remove and discard approximately one-half of your starter from the jar (yous should have about 60 thousand left). Apply a spoon. The texture will be very stretchy. Add together sixty g (1⁄2 cup) of all-purpose our and 60 thousand (one/4 loving cup) of warm h2o. Mix with a fork until smoothen.
The texture should resemble thick pancake concoction or plain yogurt (not Greek) at this point so add more h2o as needed. Cover and permit rest in your warm spot for another 24 hours.
DAYS iv, v, & vi: Keep on Feeding!
Echo the same feeding procedure as outlined on Day three:
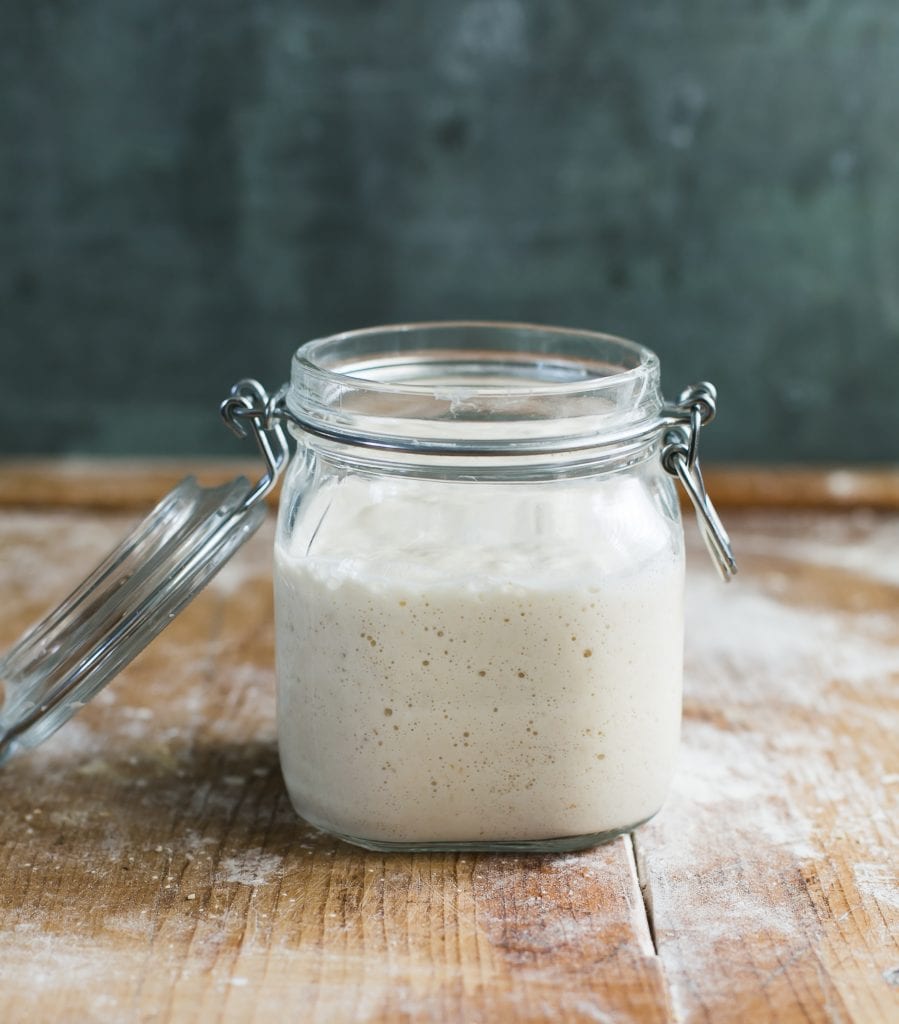
Remove and discard half of the starter, and feed it with 60 g (ane⁄2 cup) of all-purpose flour and 60 g (1/4 loving cup) of warm water. As the yeast begins to develop, your starter will rise, and bubbles will course on the surface and throughout the civilization.
When the starter falls, information technology'due south fourth dimension to feed it again.
Tip: Identify a safe band or slice of masking tape around the jar to mensurate the starter's growth as information technology rises.
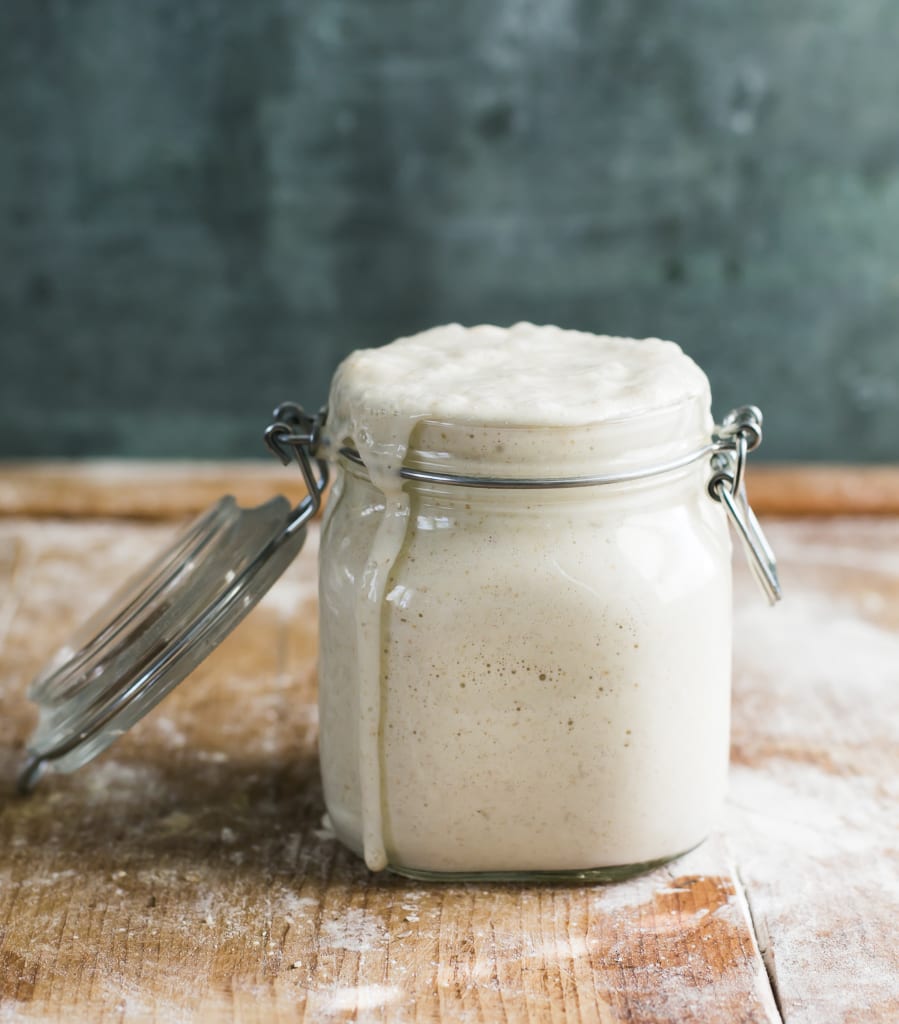
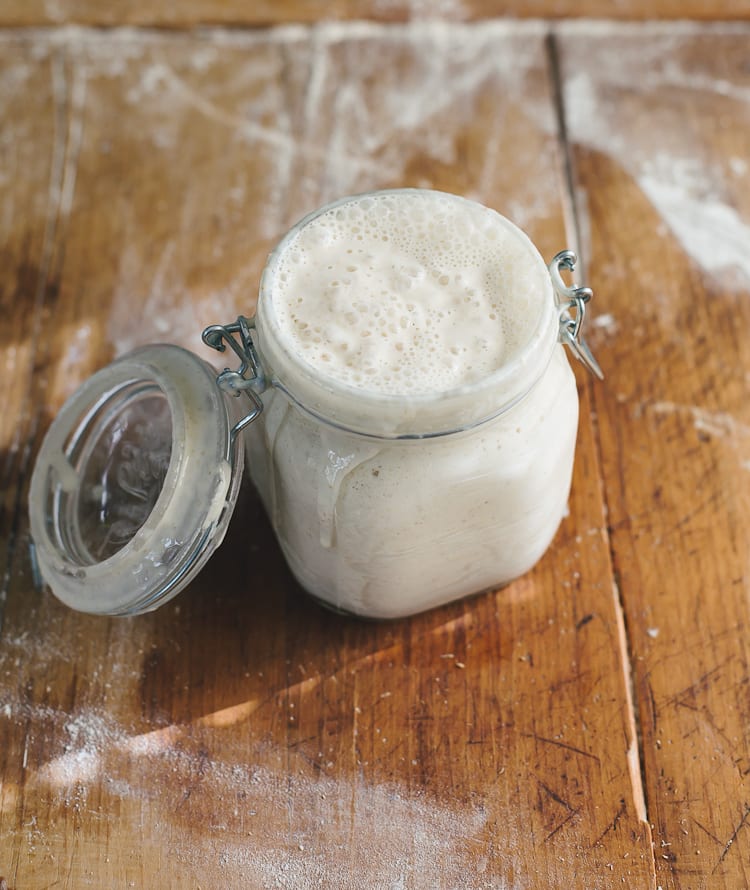
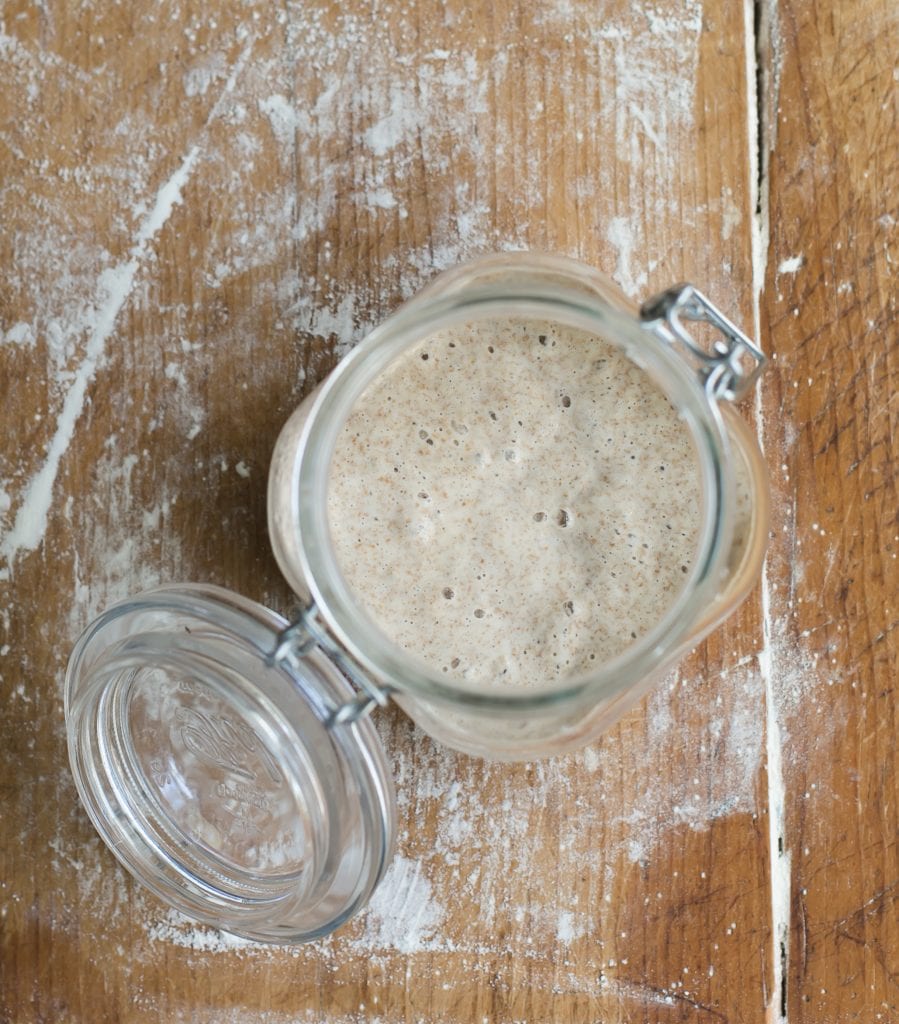
Day vii: A Sourdough starter is built-in!
By now, your sourdough starter should take doubled in size.
You should see plenty of bubbling, both large and small. The texture will now be spongy, fluffy, and similar to roasted marshmallows (call up: south'mores). It should also smell pleasant and not like stinky gym socks. If these conditions are met, your starter is now agile.
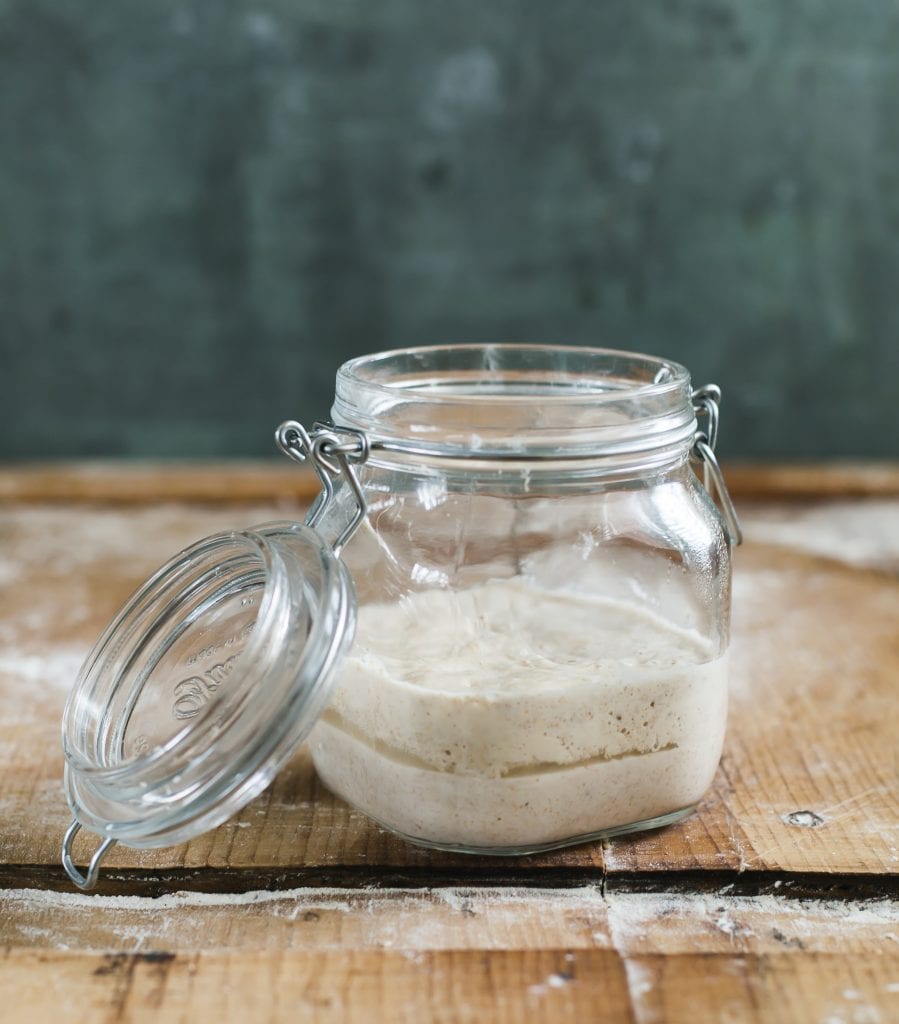
The very last stride is to transfer your sourdough starter to a squeamish, clean jar. In keeping with tradition, you tin as well proper name it (and delight do!). My starter is called Dillon after my oldest boy and it's bright and bubbly, just similar he is ;)
Now yous're set up to bake! Start with my beginner sourdough bread recipe- you're going to love it!
Additional Sourdough Resource
- Sourdough Bread Recipe (reader favorite!)
- Feeding Sourdough Starter: My Best Tips & Tricks
- Troubleshooting Your Sourdough Starter
- Sourdough Discard 101: Recipes & Faqs Answered
- Sourdough Starter FAQS
A Few Tips for Ongoing Intendance…
And so you lot've created a sourdough starter! Now what?
Just like any living creature, it must exist kept live with regular feedings to maintain its force. If your starter is not strong, your staff of life will non rise. Caring for your starter is much easier than you'd think, and certainly won't take hours of your time.
Notation: You will need to feed your starter every time prior to making staff of life dough and to maintain it (keep it alive).
How to Feed a Sourdough Starter
Feeding Routine:
- Begin by removing and discarding about half of your starter.
- Furnish what's left in the jar with fresh all purpose flour and water.
- Encompass loosely, and let it rise at room temperature until bubbly and double in size. One time it falls, the bubbles will become frothy and somewhen disappear. Then you'll know it's time to feed your starter again.
- Feed your starter everyday if it's stored at room temperature. If you continue it in the fridge, feed information technology once a week.
PS: If you miss a feeding, don't worry- your starter is not going to die. It might expect ugly (and scent horrendous) merely it usually just needs a few feedings to perk support.
When is Your Sourdough Starter Ready To Use?
Your starter is ready when information technology shows all of the post-obit signs:
- bulk growth to about double in size
- small and large bubbling on the surface and throughout the civilisation
- spongy or fluffy texture
- pleasant odor (not reminiscent of smash polish remover/gym socks/rubbing booze)
If you're having trouble spotting the signs, don't forget to place a condom band effectually the base of the jar to measure out the starter'southward growth.
You lot can too effort the float exam mentioned above: Drib a modest dollop of starter into a glass of h2o. If it floats to the pinnacle, it'due south gear up to use.
How to Shop Your Sourdough Starter
Once your starter is established, y'all have two storage options to consider.
At Room Temperature: If you lot broil oftentimes—let's say a few times a week—store your starter at room temperature. This volition speed up fermentation, making the starter bubbly, agile, and ready to use faster. Room temperature starters should be fed one to two times a twenty-four hour period, depending on how quickly they rise and fall.
In the Fridge: If you don't bake that often, store your starter in the fridge covered with a chapeau. You lot'll just need to feed it about in one case a calendar week or so to maintain its strength when non in use (y'all can merely feed it cold so pop it back in the refrigerator right after; no need to warm information technology upward first). When you lot are prepare to make dough, feed your starter at room temperature as needed, to wake information technology back up.
**TIP** For more info on sourdough starters please read Feeding Sourdough Starter: My All-time Tips & Tricks.
Sourdough Starter Faqs
1.) Tin can sourdough starter exist made with all purpose flour only?
Yes. All purpose flour is piece of cake to find, inexpensive and reliable for starter growth.
two.) Can sourdough starter exist made with whole wheat, spelt flour or rye flour only?
Aye. Because whole grain flour absorbs more water than all purpose flour, adapt the texture with additional h2o if it'south too thick.
three.) Can sourdough starter exist made with bread flour only?
Yes. Adapt the texture with boosted water if information technology's too thick.
4.) Tin sourdough starter exist made with bleached flour?
Yes. But it's non recommended. The chemicals can throw off the rising process. However, some readers have reported success with bleached flour. Your pick!
5.) I only have organic flour. Will the recipe however work?
Information technology might. To clarify: organic flour is non bad to employ. The enzymes are simply a fleck dissimilar. This means the overall process might take longer than indicated. I recommend using all purpose flour instead because information technology's more than predictable (and less expensive!).
6.) Why do you utilize whole wheat flour in the get-go of the recipe? And and then switch to all purpose flour for the feedings?
Whole wheat flour is used to jumpstart the fermentation process. If you do not accept whole wheat flour, just utilise all purpose flour instead. The starter volition be fine. I switch to all purpose flour for the feedings because it'southward reliable, inexpensive and practical for everyday baking (recall, a portion of your starter is removed, discarded, or used for something else).
vii.) Why do you remove and discard a portion of the starter earlier feeding it?
8.) Tin I utilise the sourdough discard from Day 1-vii for something else?
In the starting time, I typically don't recommend using the discard (it's normally really smelly and discolored). I recommend using the discard subsequently the starter has been established. However, everyone will have a unlike experience with this. If it looks good- employ it!
For more info delight read, Sourdough Discard 101: Recipes & Faqs Answered.
9.) Is information technology bad to switch flours halfway through the feeding process?
If your starter is used to i blazon of flour, and then y'all swap it out for something else, just give it time to conform. It might react immediately (in a good way!) or it might be sluggish at commencement and so somewhen perk upward.
For more info please read, Feeding Sourdough Starters: My Best Tips & Tricks.
*This post contains chapter links. Cheers for your support friends! *
Clarification
Looking for an easy, sourdough starter recipe for beginners? Adapted fromArtisan Sourdough Fabricated Simple,follow my no-nonsense guide for practical tips, tricks, and ongoing care- anyone can practice it.
1x (5lb) bag all purpose flour (I utilise either KAF, Trader Joe's, or Whole Foods)
Water (preferably warm around 85F )
Notes & Tips
- The overall process typically takes 7 days, if the temperature is warm plenty. However, information technology can accept up to two weeks or more for a strong starter to get established. Please be patient. Observe a warm spot for your starter to rise (encounter tip in recipe below), and employ warm h2o in your feedings (if necessary) to give the fermentation a boost.
- Only a pocket-sized corporeality of whole wheat flour is used to jumpstart the fermentation process. If you don't desire to commit to a big bag, smaller bags are available in about grocery stores. Alternatively, you tin utilize all purpose flour just.
- You will likewise need 1 big 3/4 50 jar, or something of like size (I employ this one.).
Day 1: Combine threescore g (ane⁄2 loving cup) of whole wheat flour and 60 thousand (1⁄4 cup) of warm water in a large jar. Mix with a fork until smooth; the consistency volition be thick and pasty. If measuring past volume, add more than water to slightly thin out the texture if necessary. Cover with plastic wrap, reusable wax wrap, or a lid and let it rest in a warm spot, most 75-80 F, for 24 hours. Temperature is of import.
TIP: Looking for a warm spot? Place your starter on a cookie sheet within the oven (turned off) with the lite on for an hour or ii (it can go hot in there, so go on yous heart on it!). Center rack is best. Y'all tin can as well use a proofing box set to your desired temperature, or a microwave with the door ajar and light on.
Day 2:Check to see if any bubbles take appeared on the surface. If you lot don't run across anything, information technology'due south okay. The bubbles might have appeared and dissolved overnight while you were sleeping. You don't have to exercise anything else at present. Residue the starter for another 24 hours.
TIP: During the creation process, and fifty-fifty subsequently your starter has been established, a dark liquid might appear on the surface and throughout the culture. It has a very stinky smell, similar to rubbing alcohol or gym socks. This liquid is called "hooch" and is an indication that your starter needs to be fed. It's normal. Any time y'all see this liquid, it's best to remove it forth with whatever discolored starter present. Still, on Day 2 simply leave the hooch lone. Y'all can remove information technology tomorrow when you showtime the feedings.
Mean solar day 3: Remove and discard approximately half of your starter from the jar (yous should have lx k left). The texture volition be very stretchy. Add together 60 g (1⁄2 loving cup) of all-purpose flour and 60 g (i/4 cup) of warm water to the jar. Mix with a fork until smoothen. The texture should resemble thick pancake batter or obviously yogurt at this point. Encompass and let residue in your warm spot for some other 24 hours.
Days 4, 5 & 6: Continue feeding your starter: remove and discard nearly half and add 60 yard flour + threescore g warm h2o each day.
As the yeast begins to develop, your starter will ascension, and bubbles will form on the surface and throughout the culture. When the starter falls, it's fourth dimension to feed it once more.TIP: Place a rubber band or piece of masking tape around the jar to mensurate the starter's growth equally information technology rises.
Day seven: By now, your starter should have doubled in size. You should see enough of bubbles, both large and small. The texture will exist spongy, fluffy, and like to roasted marshmallows (think: s'mores). It should odour pleasant, and not link stinky like gym socks. If these conditions are met, your starter is now active and prepare to utilize!
Please keep in heed, if your starter is not ready at this point which is quite common due to temperature bug (likewise common cold), timing, and other factors, continue the feeding it for 1-2 weeks or more. Exist patient!
The very concluding stride is to transfer your starter to a nice, clean jar. In keeping with tradition, you can too name it and please do! My starter is called Dillon, after my oldest boy.
At a glance, your overall daily schedule with measurements should look like this:
- Mean solar day 1: 60 g flour + 60 g h2o = 120 g starter
- Twenty-four hour period 2: Do zippo
- Day iii: Remove & discard half of the starter/ 60 g starter + 60 g flour + threescore thousand water = 180 g starter
- Twenty-four hours 4: Remove & discard one-half of the starter/ 90 m starter + 60 grand flour + sixty 1000 water = 210 thou starter
- Day five: Remove & discard half of the starter/ 105 k starter + 60 k flour + 60 grand water = 225 g starter
- Day 6: Remove & discard half of the starter/ 112.2 m starter + 60 one thousand flour + 60 g water = 232.5 k starter
- Day vii: Remove & discard one-half of the starter/ 116.25 g starter + threescore g flour + 60 g water = 236.27 g starter
Wondering if your starter is gear up to employ?
When your starter is fully active, do the float examination. Feed your starter, expect for it to double in size, and then drop a teaspoon of bubbly starter into a jar of h2o; if it floats to the top information technology's set up to apply.
Storage Options
If you broil ofttimes, store your starter at room temperature (feed it 1x-2x a solar day to go along it active). If you plan to broil only one time in a while, store it in the fridge to preserve its strength (feed it 1x a week). When storing your starter in the refrigerator, at that place'southward no need to bring it to room temperature first before feeding it. Simply requite it some flour and water and pop it back in the fridge.
Keywords: sourdough, sourdough starter, beginner sourdough starter, recipe
Source: https://www.theclevercarrot.com/2019/03/beginner-sourdough-starter-recipe/
0 Response to "How Do You Know When Your Sourdough Starter Is Done"
Post a Comment